DIY wedding decor: How to make photo bunting in four easy steps
An easy crafting idea to make DIY bunting from photographs

I found this great DIY wedding idea - Photo Bunting via Ruche - and immediately wanted to share it with all of you. It's an unique way to add your personal touch to your wedding reception decorations. Add pictures of you and your love to tell a story.
Bunting is a really versatile decoration. You can hang it indoors to liven up a corner, use it to drape around tables, above a doorway or to create an outdoor archway.
Which photographs will you use?
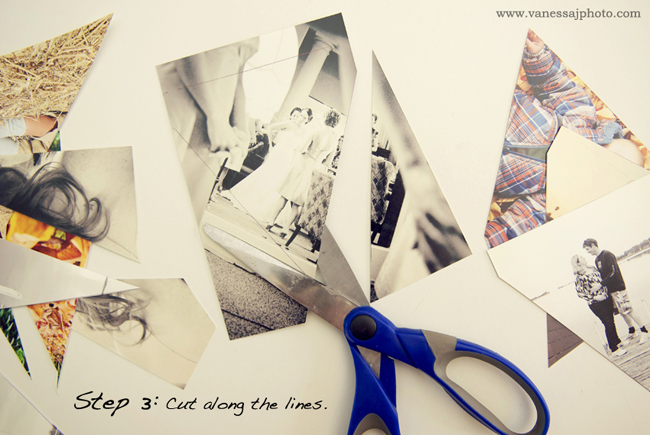
In this tutorial sepia and black and white photographs have been used - but of course it's up to you. To get the right look we suggest you have a theme to your bunting - use people's faces, or monochrome tones or a colored filter like sepia.
Of course, you don't have to just use photographs of you and your other half. You could have photographs of places that mean a lot to you or images of your family and friends. Or you could cut out pictures from magazines to use in different areas of your reception - say drinks for the bar area or cakes for a cupcake bar. Use your imagination!
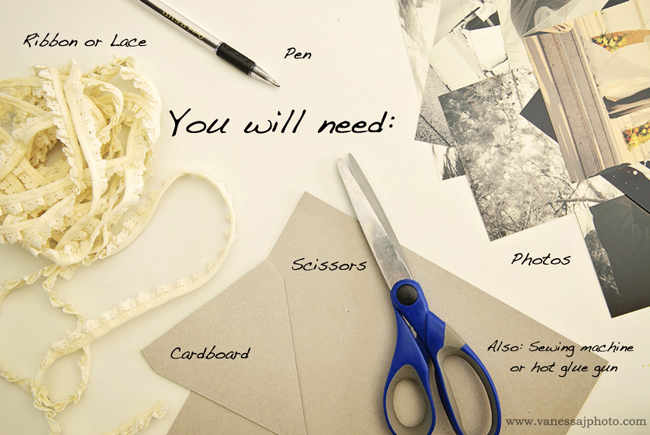
You won't need any special equipment to make this bunting either, it's very straightforward. Most of it you will probably have everything at home already, although you might need to buy a glue gun (which is always a useful item to have for crafting). But if you're missing anything, a quick visit to your local craft shop will find everything you want - and inexpensively also.
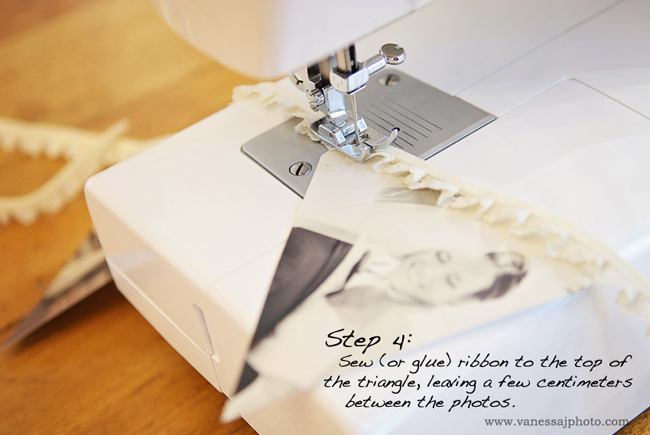
In this tutorial the crafter has used cream ribbon and lace to hang the photographs onto, which gives a vintage kind of look. However, if you want a different effect then you could use lengths of colored string or ribbons in different shades.